SQL Server installation
by Yogi P - May 28, 2022
SQL Server installation guide
This article will explain how to install the SQL Server 2019 Developer Edition and SQL Server Management Studio (SSMS) step by step.
Install SQL Server 2019 Developer Edition in windows
Before starting installation process we need to Download SQL Server 2019.
You can download SQL Server 2019 from this link -> Download the SQL Server here:
While downloading Download the SQL Server the Microsoft will provide you with some SQL Server editions options. You can select as per your requirements, like for learning purposes, you can use the Developer edition of SQL Server.
When download is complete, then we are ready to start process for SQL Server installation. Now double-click the downloaded installer ( .exe ) file, this will start installation process and will launch the downloader.
1. Choose Download Media option, when downloader ask you to select the installation type. Download Media option will first download the setup files and then start SQL Server installation.
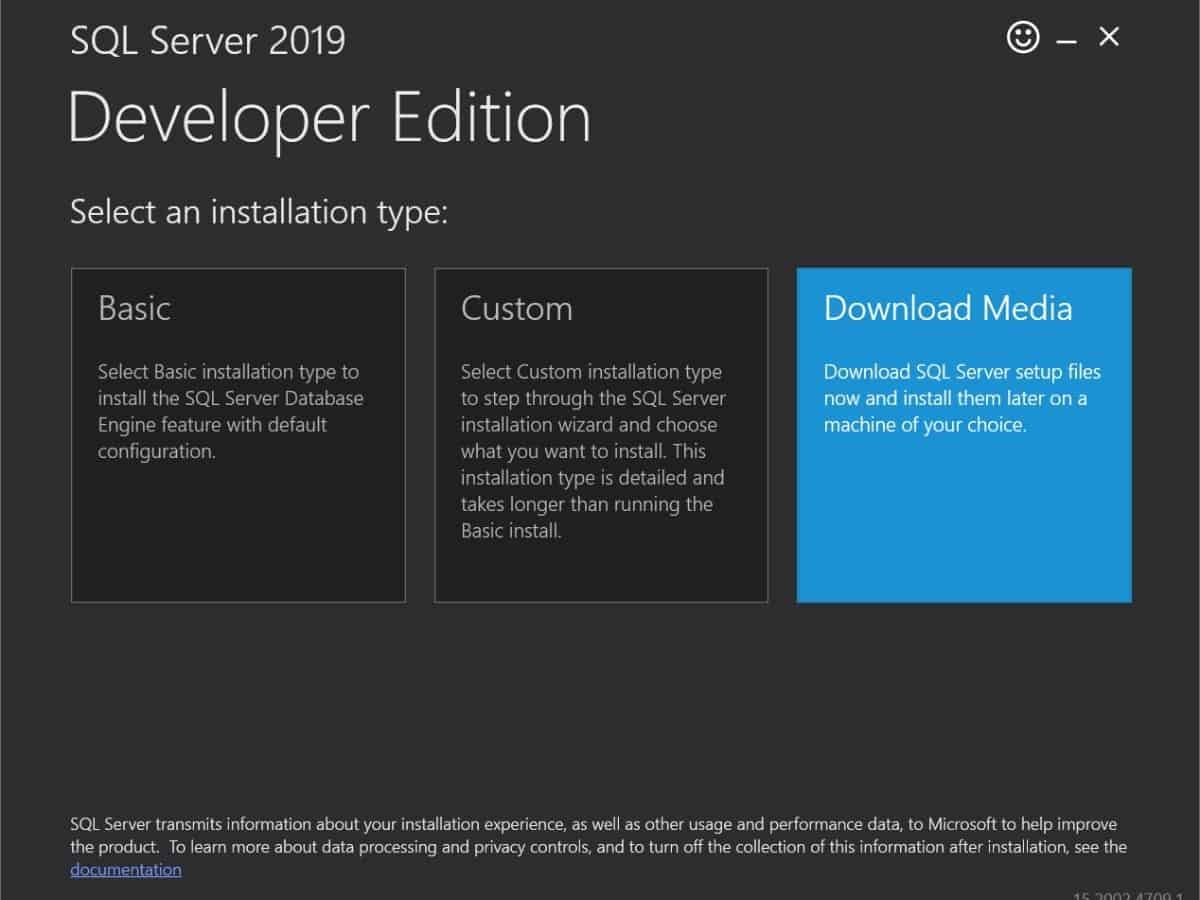
SQL Server installation – Choose Download Media option
2. Now specify the location of the folder for storing installation files, and then click Download button
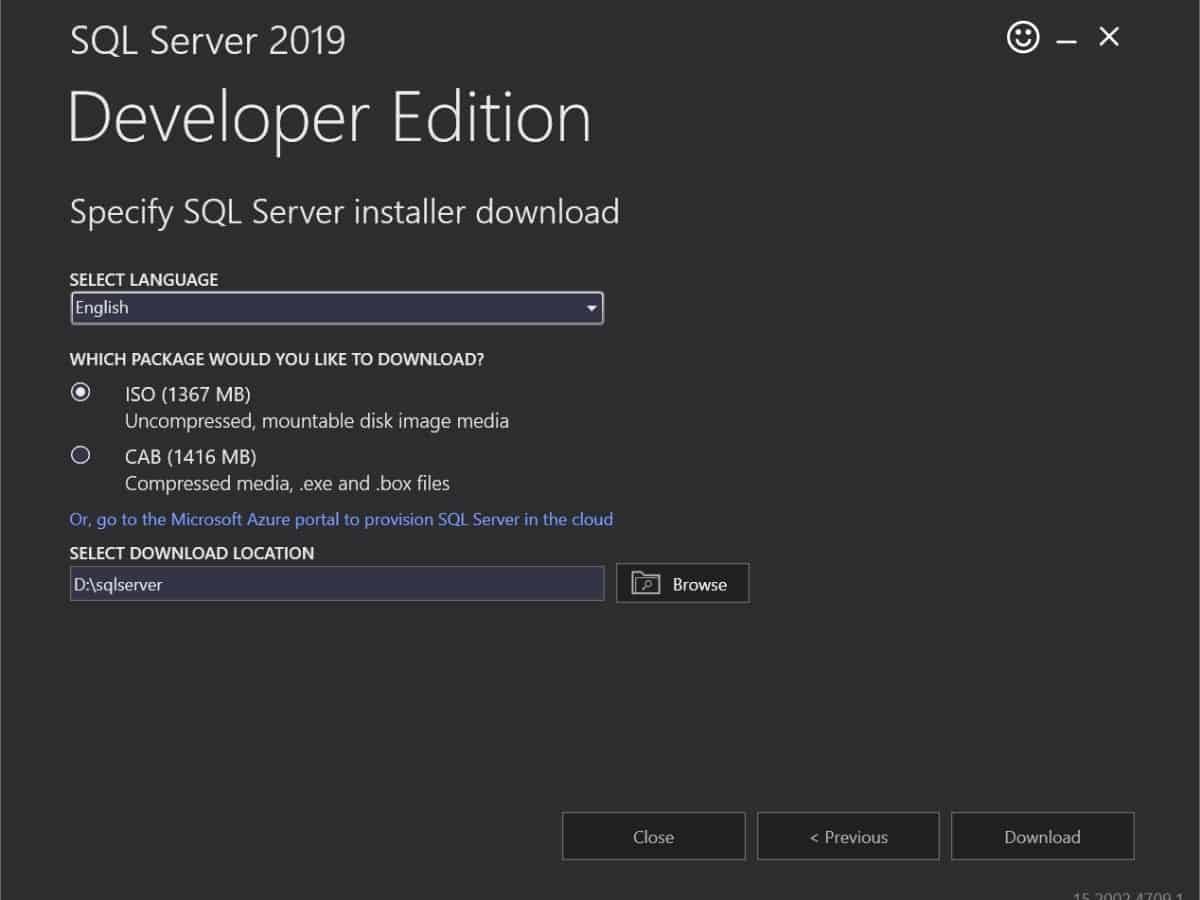
SQL Server installation – Specify the location and download
3. Now downloader will start downloading installation files. It may take a while to complete the download depending upon your internet connection speed.
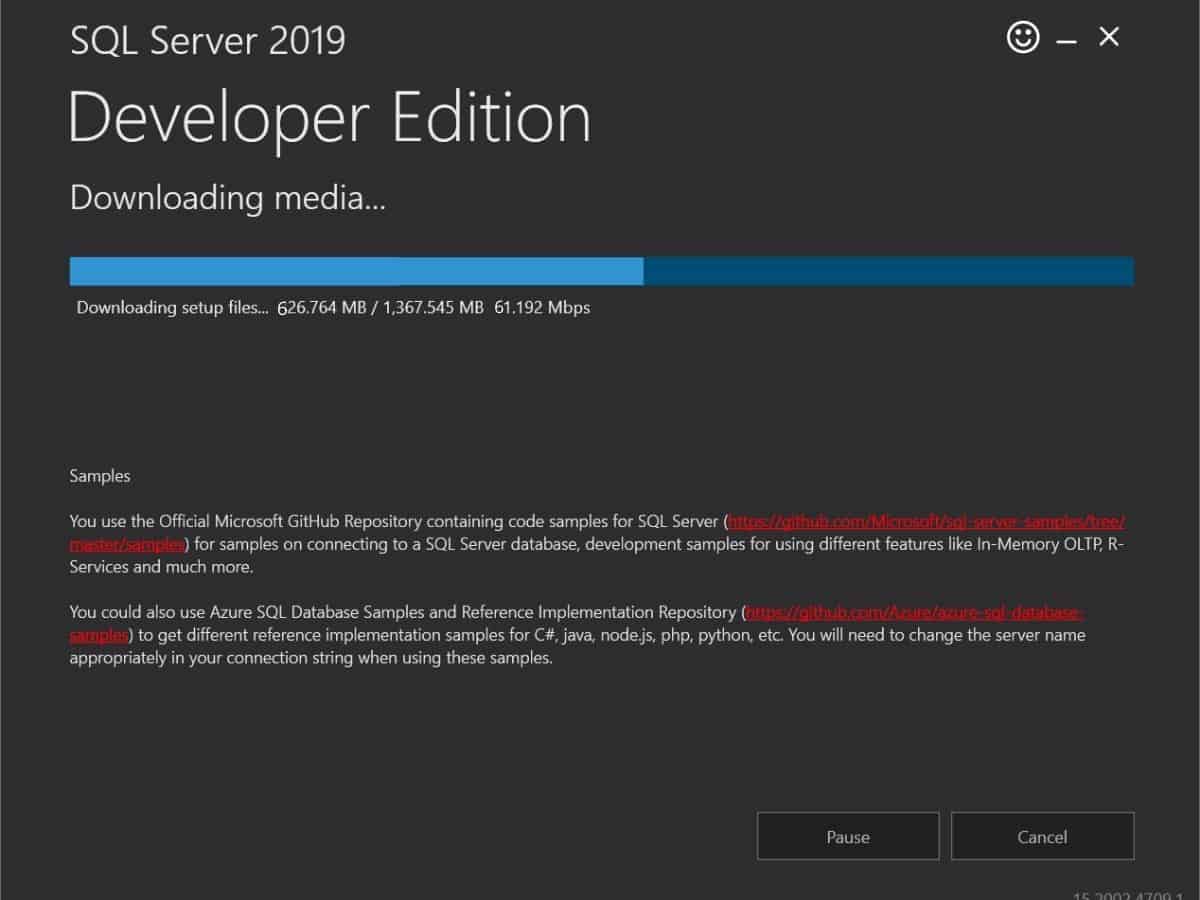
SQL Server installation – Downloading installation files
4. After completion of download, open this downloaded folder and right-click the iso file found inside this folder and mount the iso file

SQL Server installation – download complete
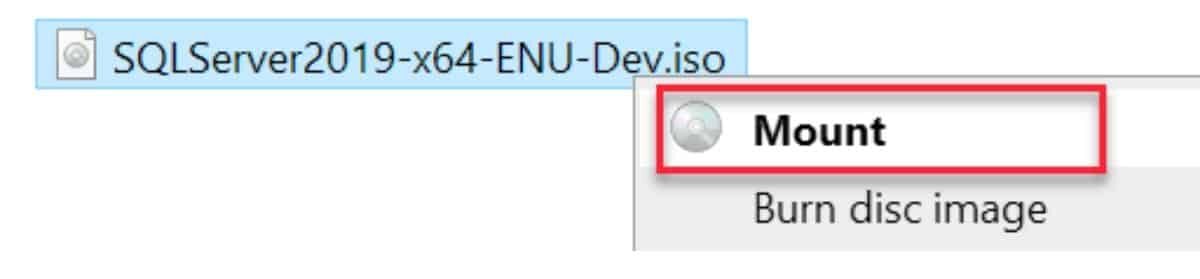
SQL Server installation – Right click and mount ISO
6. Now browse to this mounted ISO file and open the installation folder and locate setup.exe file , double click this setup.exe file to launch the installer
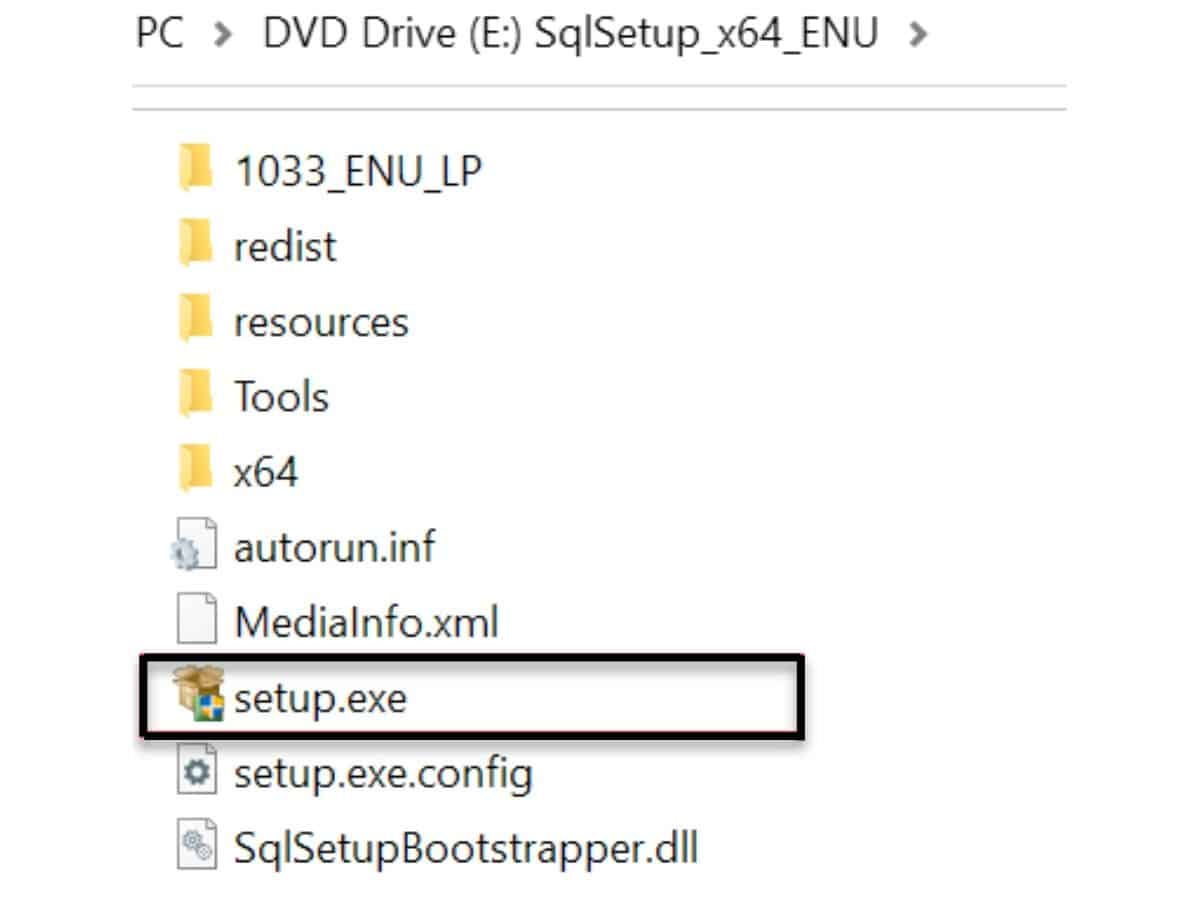
SQL Server installation – Double click setup.exe file to launch installer
Installation of SQL Server 2019 developer edition
1. After launch of installer, you’ll see a window as shown below –
Then select installation option from left pane
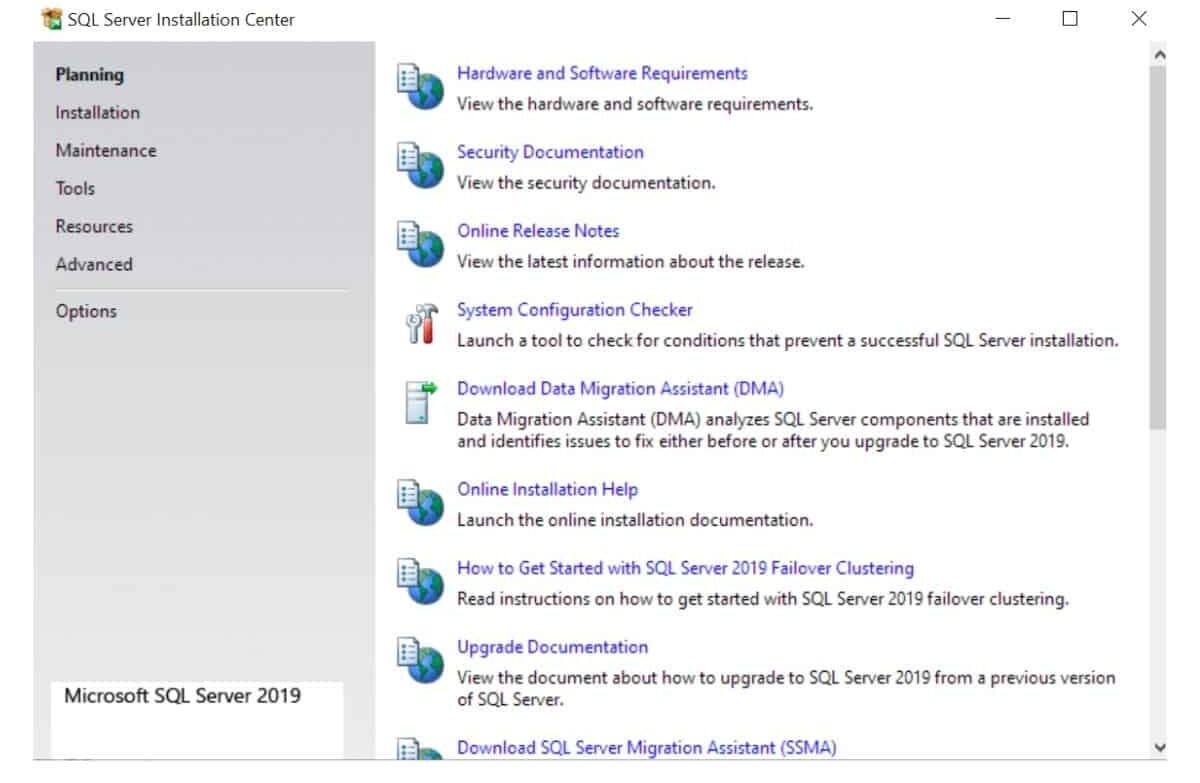
SQL Server installation – Select the installation option
2. Now select ‘New SQL Server standalone installation or add features to existing installation’, and it will launch SQL Server installation wizard to install SQL Server 2019
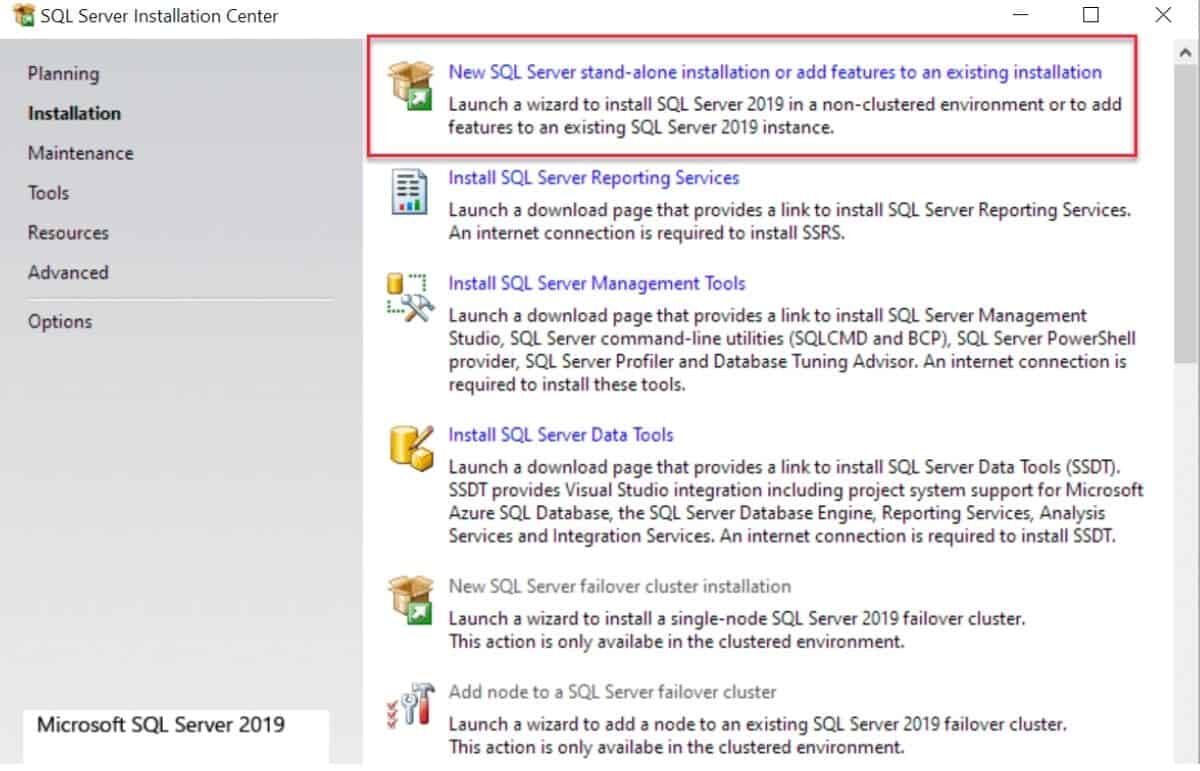
SQL Server installation – Select new SQL Server standalone installation or add features to existing installation
3. Now specify the edition which you want to install, if you are using it for learning purposes, Select Developer edition, and then click on the Next button.
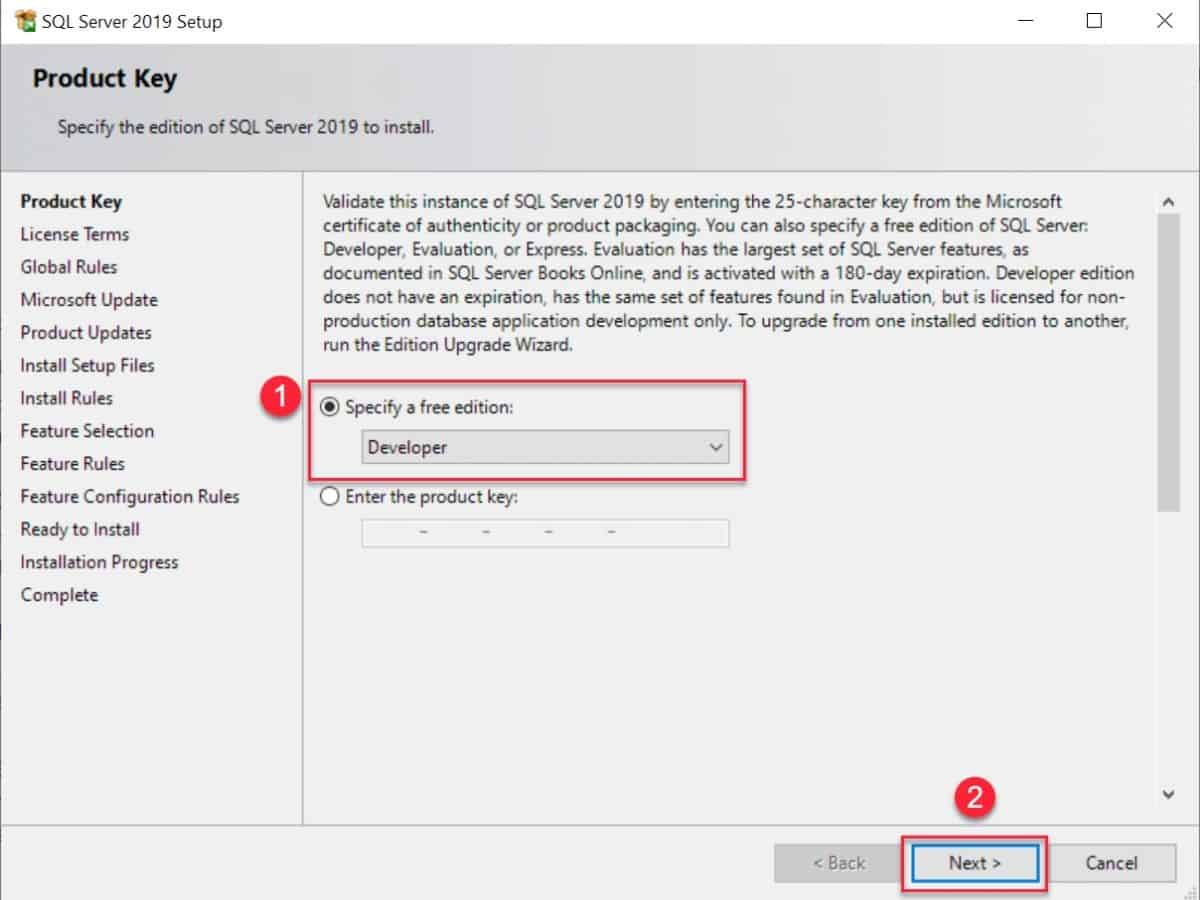
SQL Server installation – Select Developer edition
4. Accept the license terms and click on the Next button
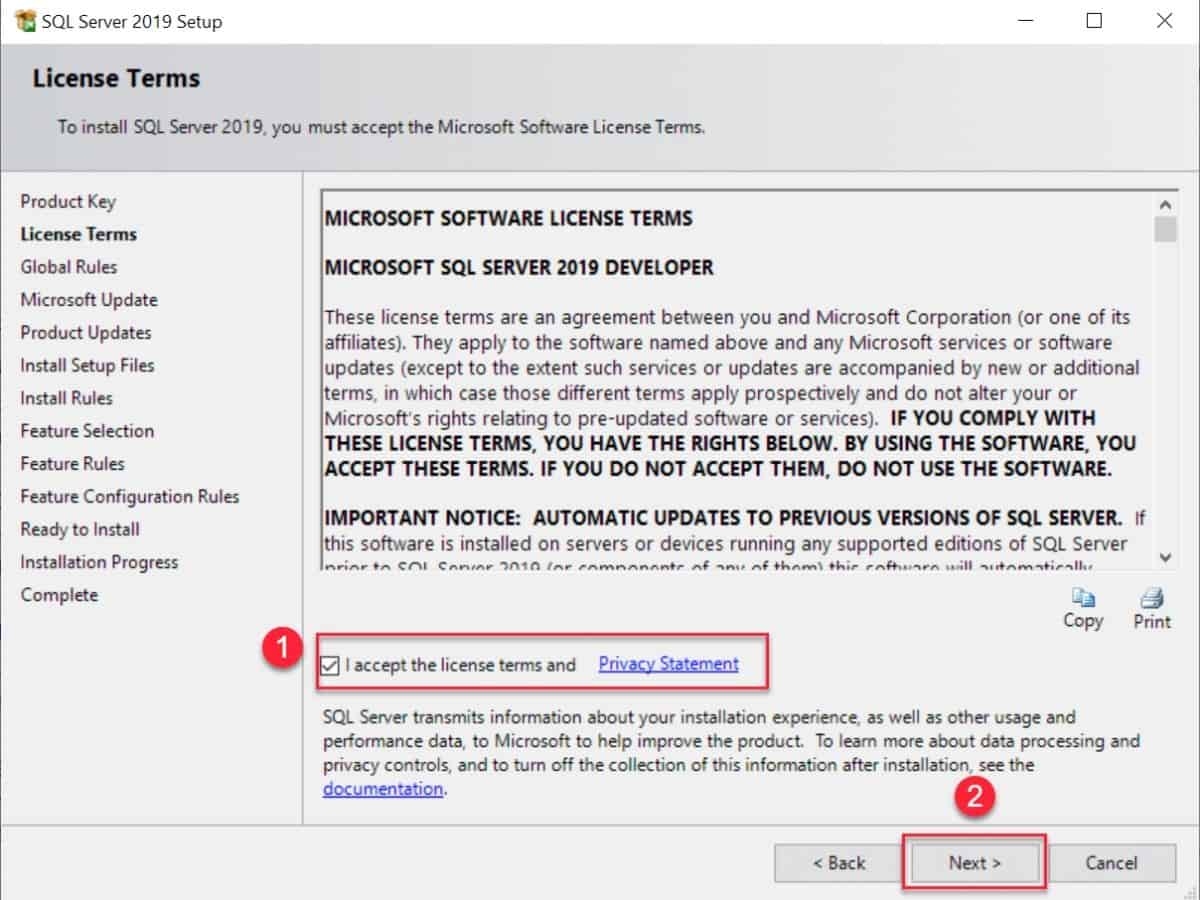
SQL Server installation – Accept the license terms
5. Now check if you want to get updates for SQL Server and if you don’t want to get these updated then uncheck the boc which says “Use Microsoft Update to check for updates (recommended)” and then click on the Next button
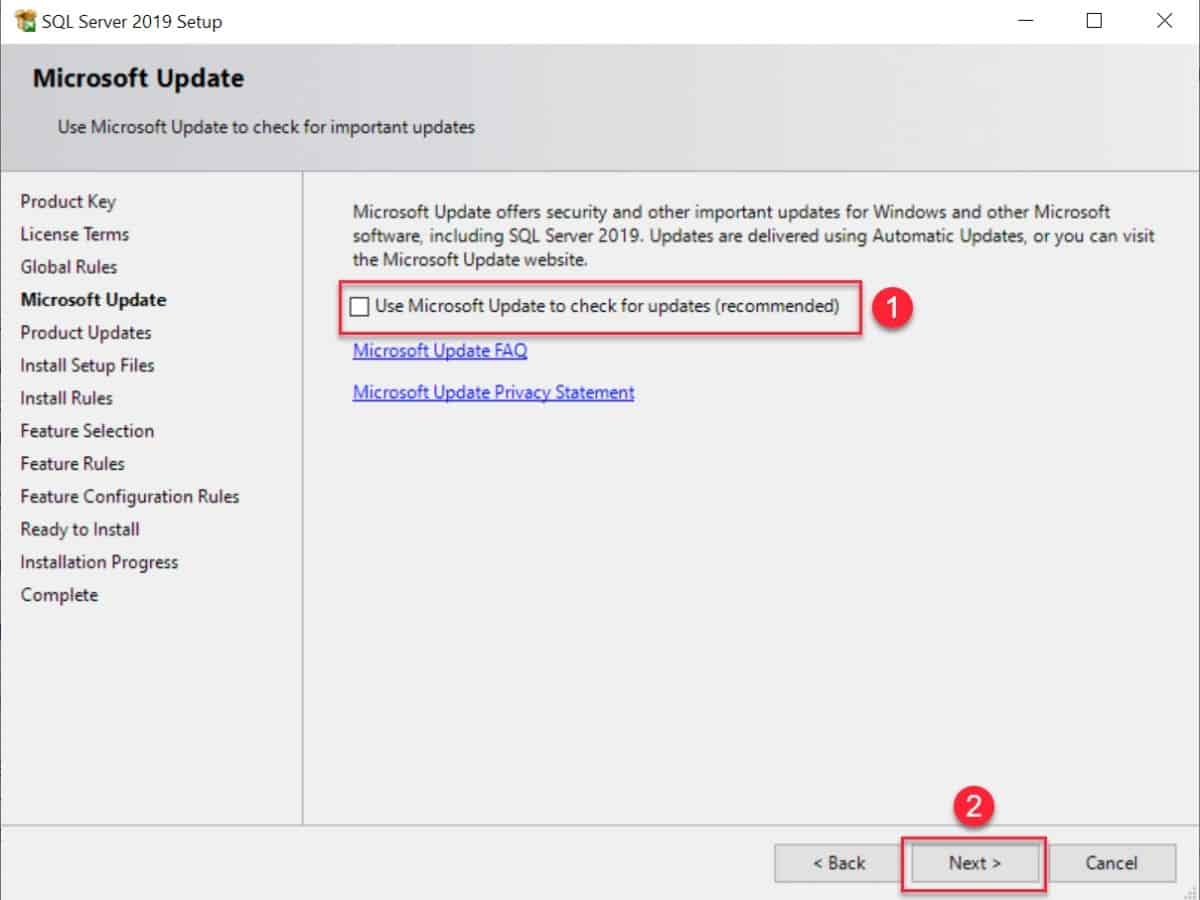
SQL Server installation- check if you want to get updates for SQL Server
6. Now the installation process will check for the prerequisites and if all is good then, click on the Next button
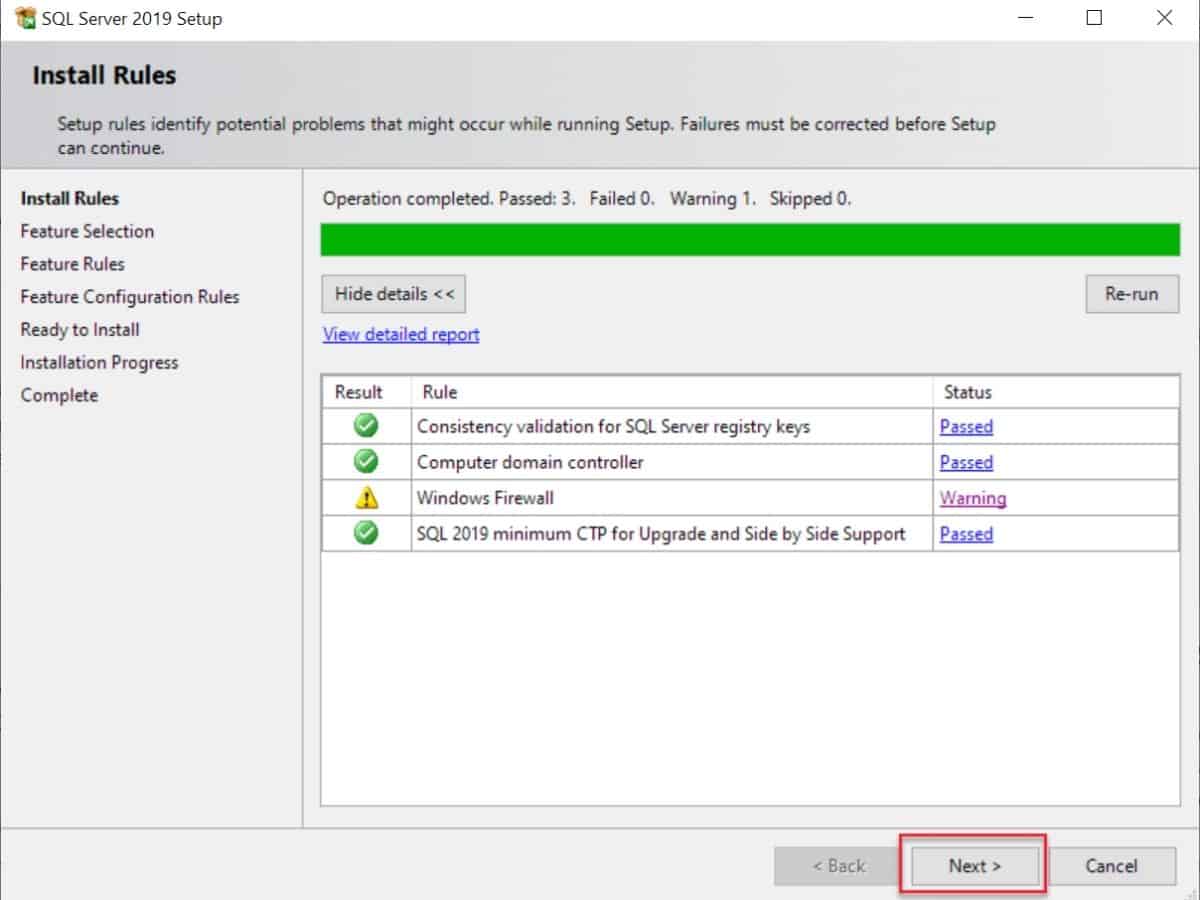
SQL Server installation – check for the prerequisites
7. Now select features that you want to include in installation, like if you are doing this SQL installation for learning purposes, then you may need the Database Engine Services, so select it and click on the Next button to continue installation process.
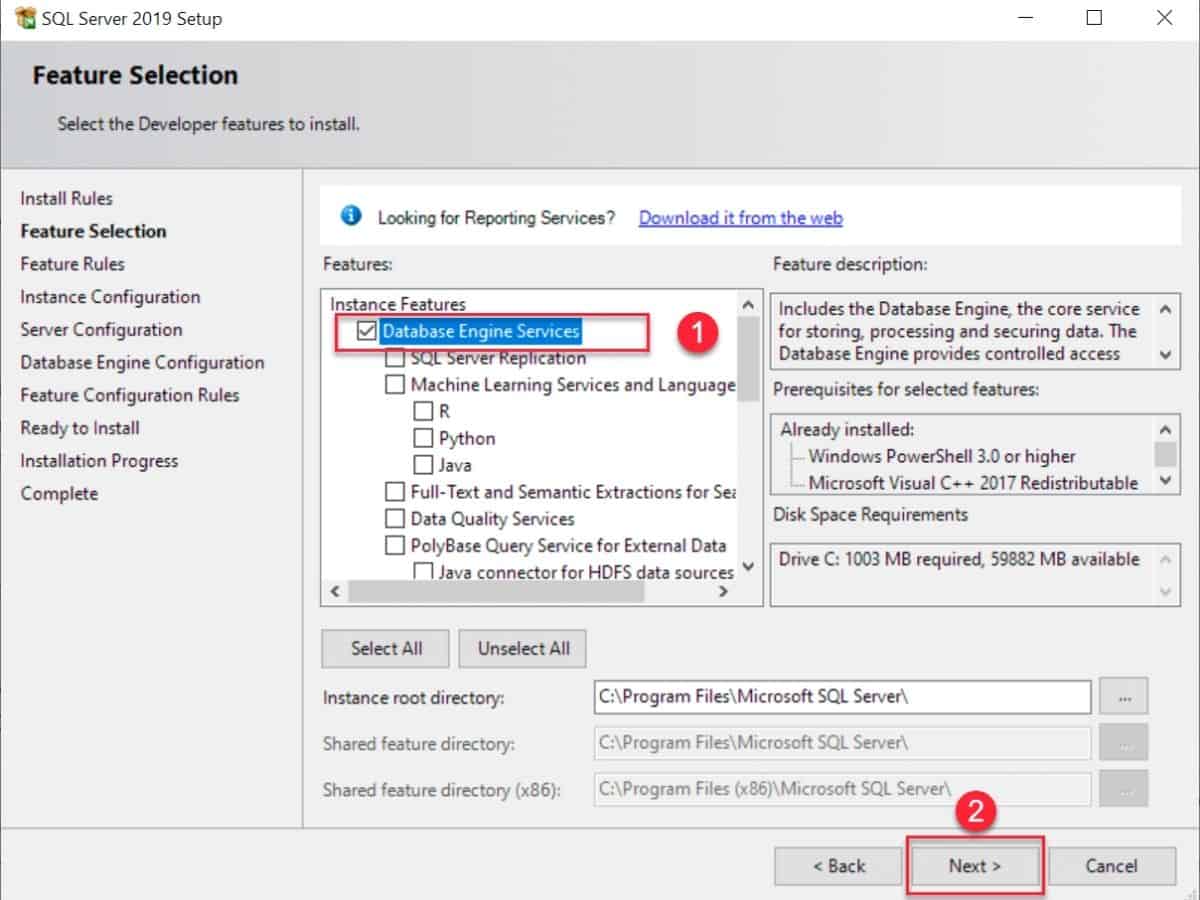
SQL Server installation – Select features that you want to include in installation
8. Now type the instance ID of SQL Server and click on the Next button
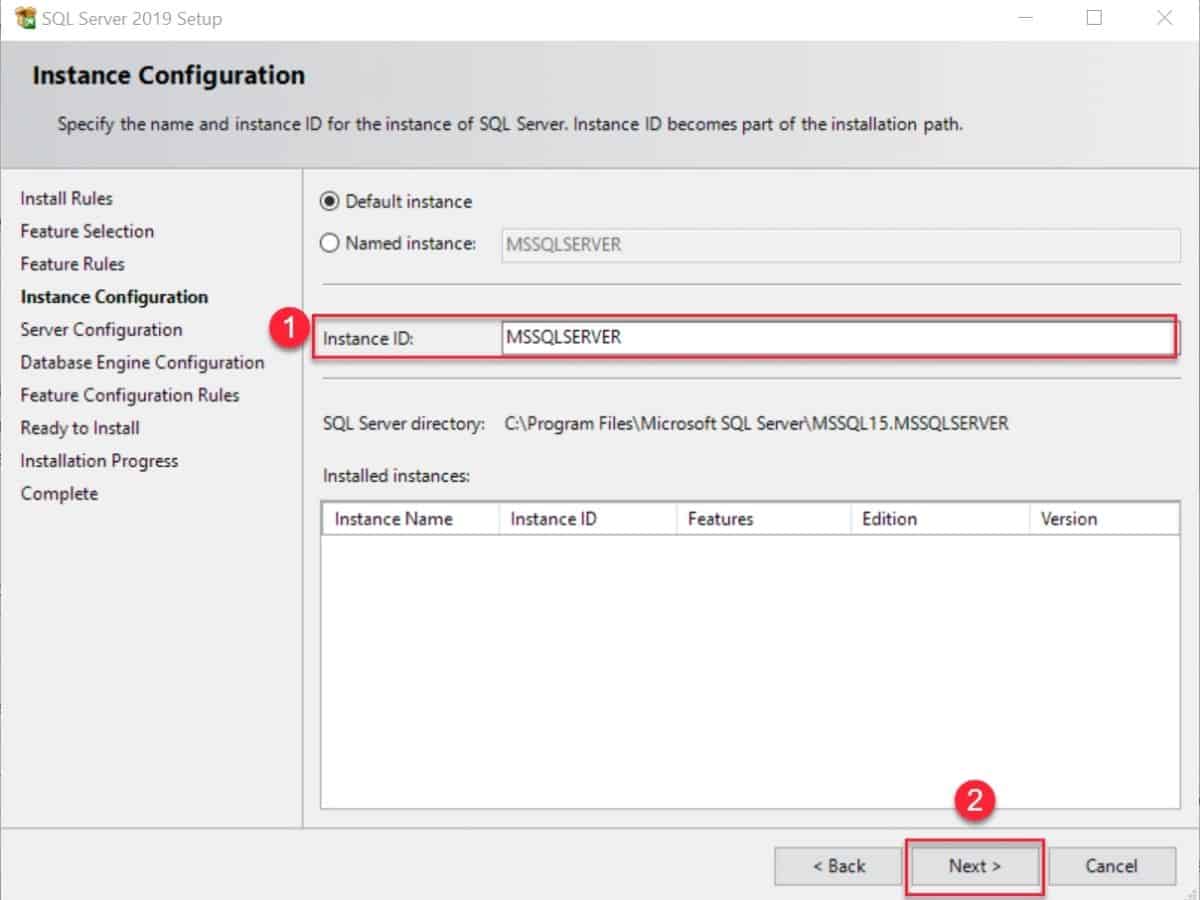
SQL Server installation – Type the instance ID of SQL Server
9. Now in Database Engine Configuration select the Mixed Mode, Type the password which you want for system administration account, You will need this password to connect to the SQL Server later on. Now click on the Add Current User to specify the SQL Server Administrators, and then click on the Next button.
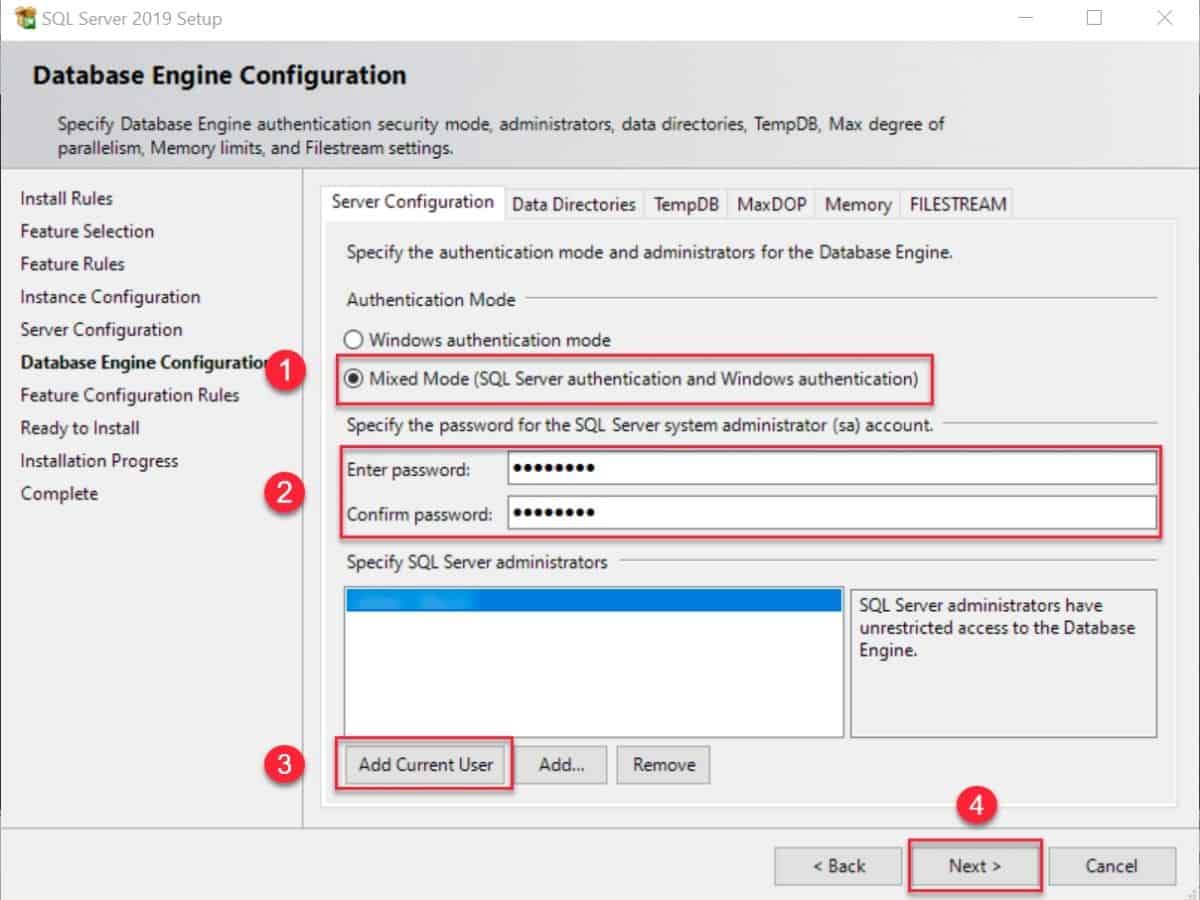
SQL Server installation – System administration account setup
10. Now finally verify the features of SQL Server 2019 to be installed and once verified and found okay then click on Install button. Now installation of SQL Server with selected features will start.
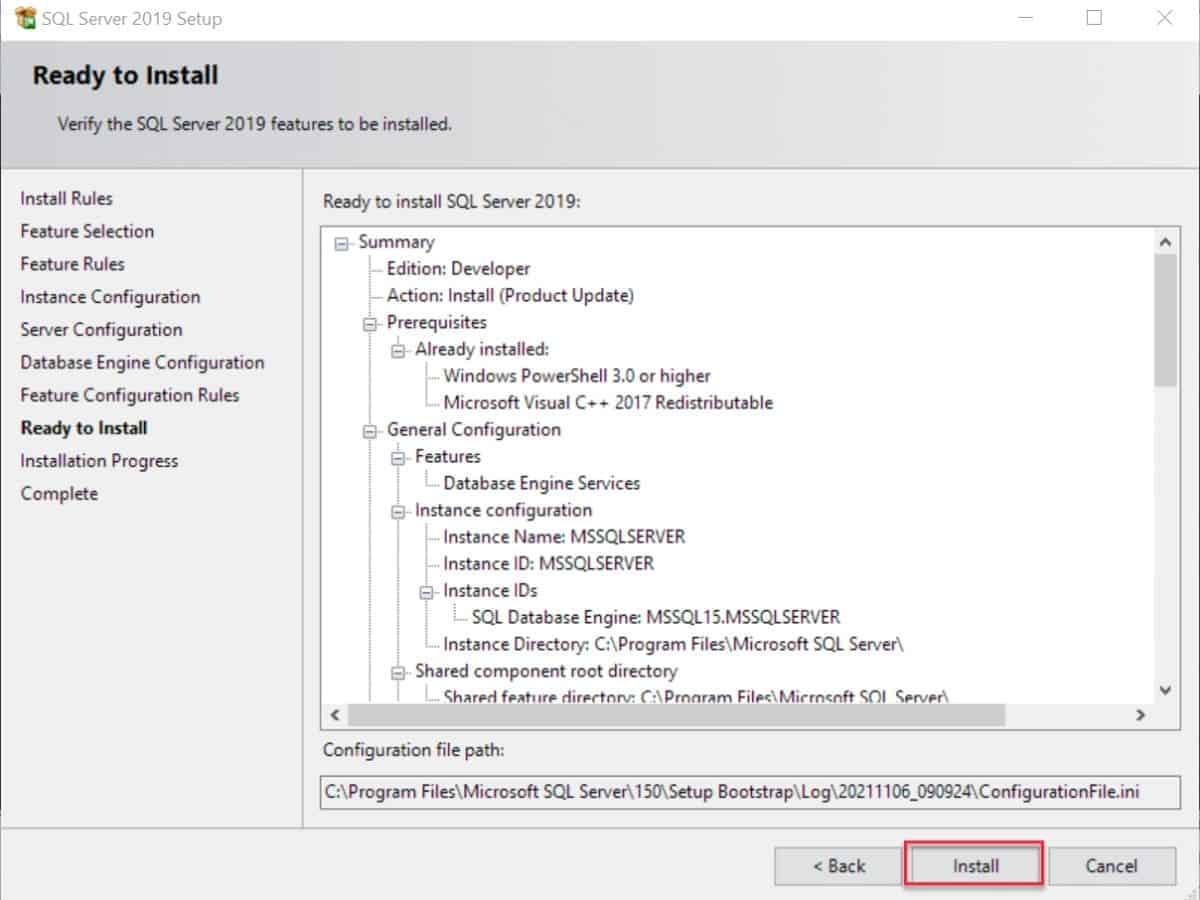
SQL Server installation – Verify the features of SQL Server 2019 to be installed
11. You will be able to see the success message when installation completes. Now click on the Close button and with this the installation of SQL Server is complete.
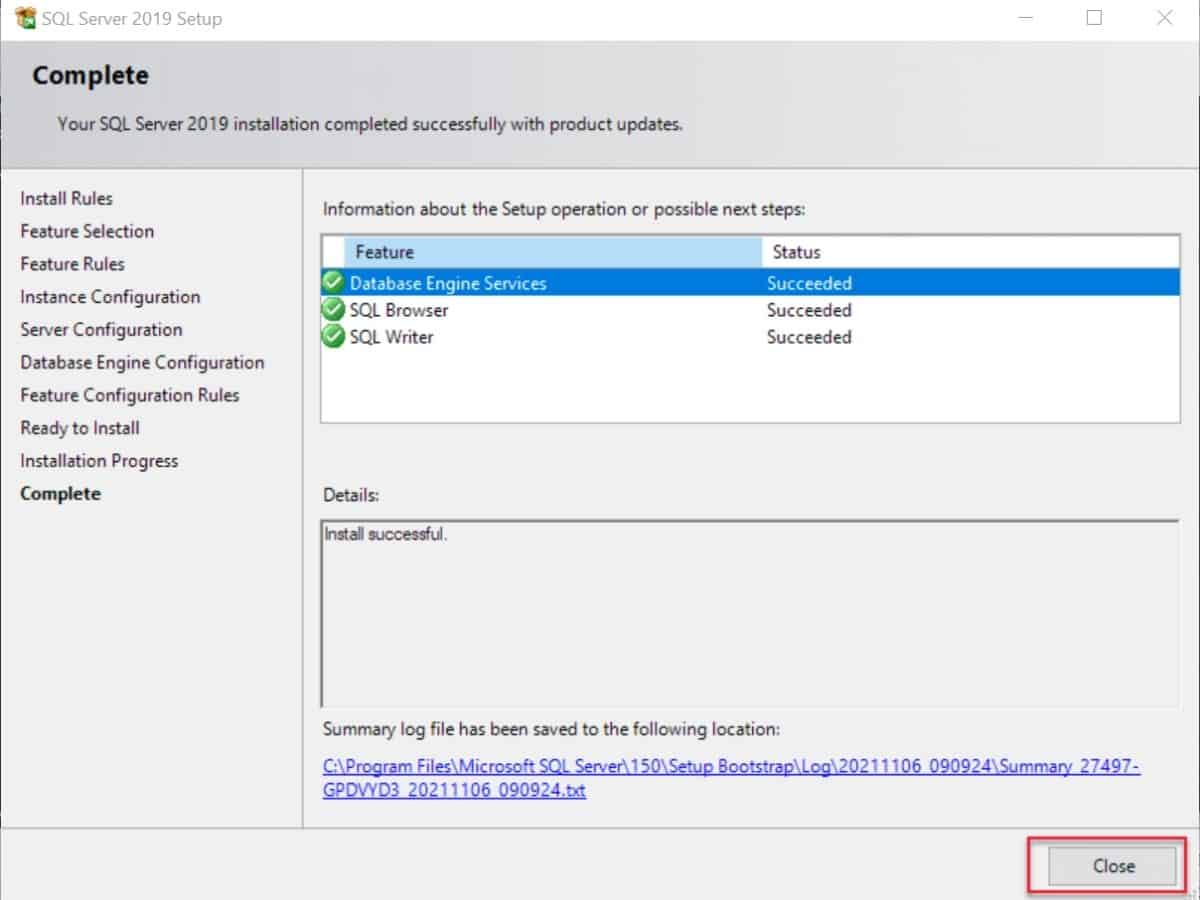
SQL Server installation – Success message when installation completes
Install Microsoft SQL Server Management Studio in windows
We need a SQL Server client tool to interact with SQL Server. For this Microsoft provides SQL Server Management Studio (SSMS). SQL Server Management Studio is software used to interact with SQL Server and querying, designing, and managing SQL Server in the cloud or on your local computer.
SQL Server Management Studio provides you tools to monitor, configure, and administer SQL Server.
For installation of SQL Server Management Studio (SSMS), we need to download it from Microsoft website using below link:
After downloading the installation file, double-click this installation file named as SSMS-Setup-ENU.exe , this will launch the installer of SQL Server Management Studio.
The installation process of SMSS is not that much complicated and it is easy to follow.
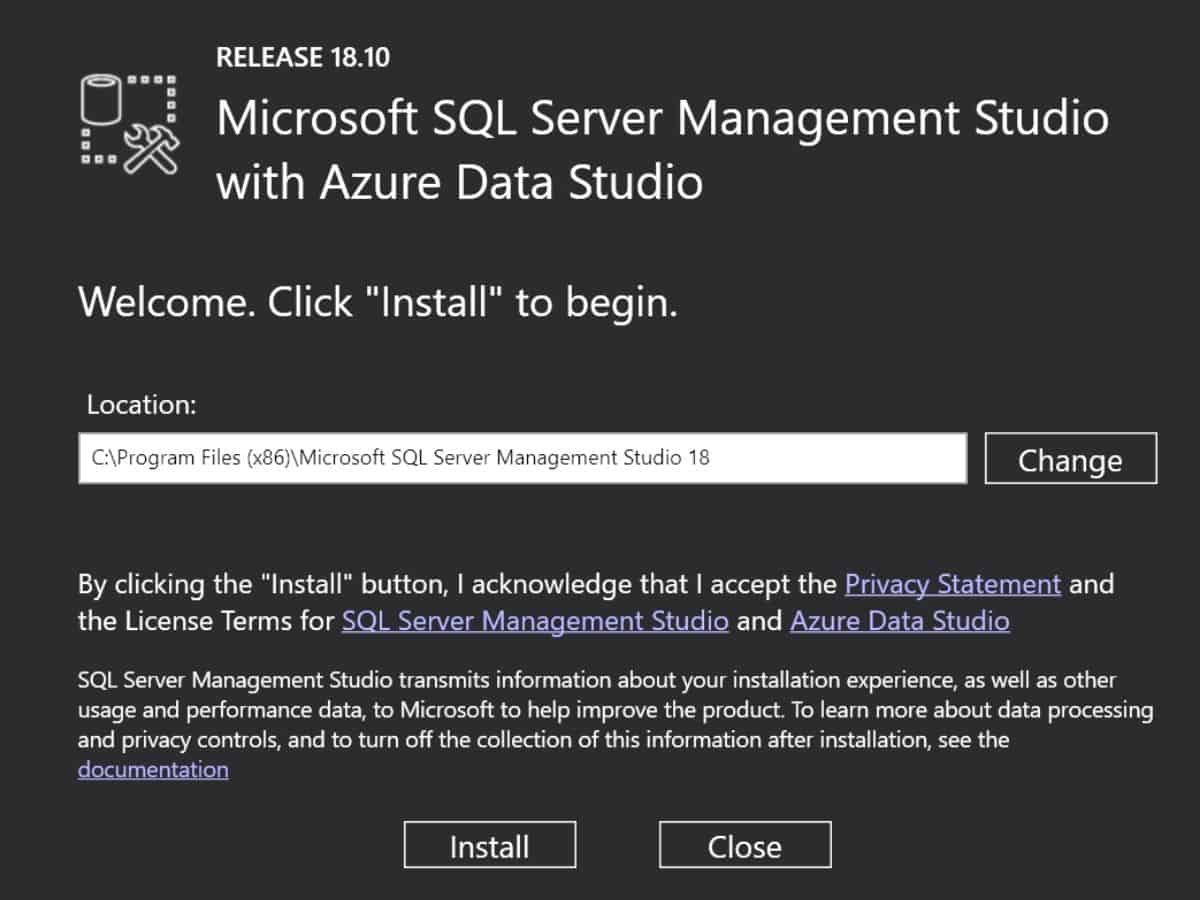
1. After double-clicking the installation file ( SSMS-Setup-ENU.exe ) installation window will open. Check the installation location, if you are not sure about it then leave it as it is and click the Install button
installation process of SMSS
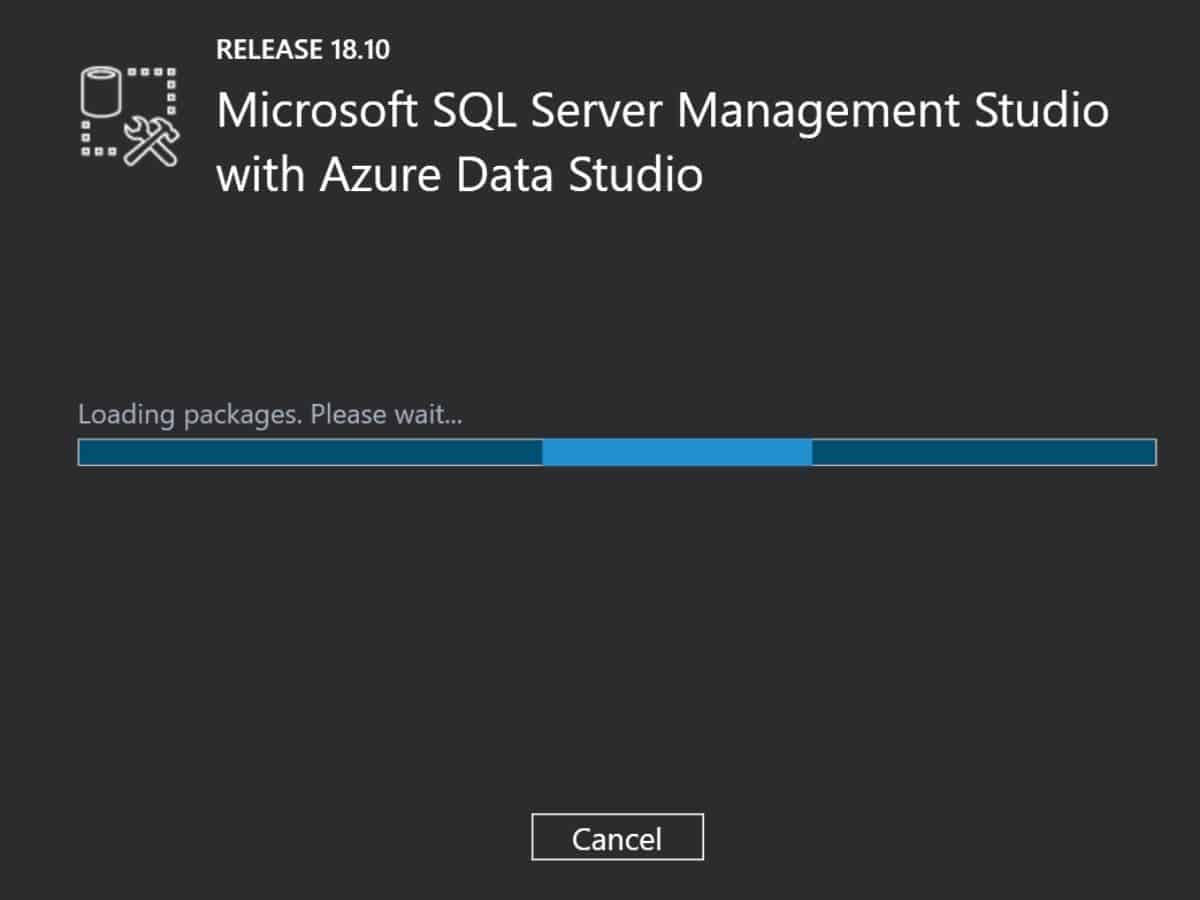
2. Now the installation process will start, wait for some time while the installer sets up the software.
Installation process of SMSS started
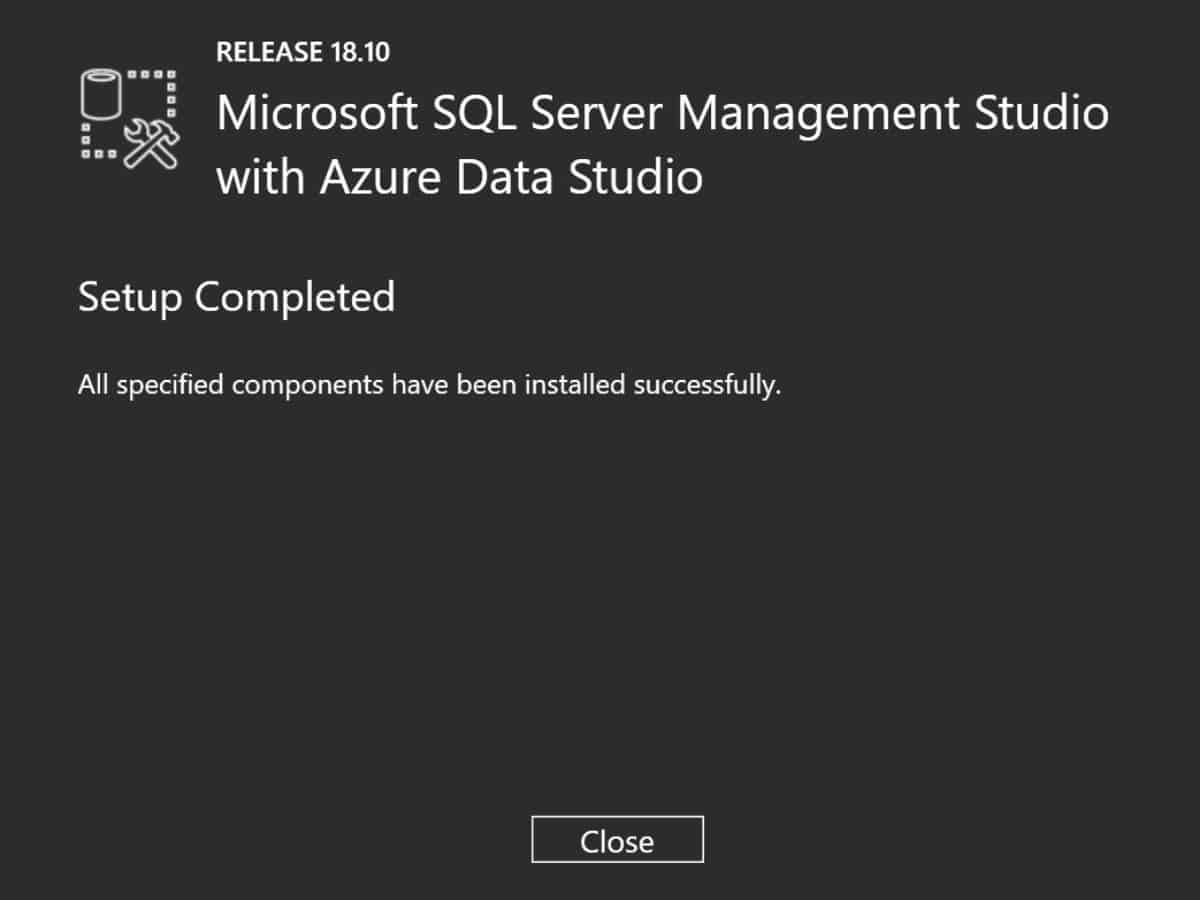
3. Now when installation is completed you will see a success message, then click on the Close button and with this the installation of SQL Server Management Studio is complete.
Installation of SMSS is completed


 Pin It


![Taxmann’s Bharatiya Criminal Laws – Bare Acts [Hindi] COMBO [Bharatiya Nyaya Sanhita (BNS) | Bharatiya Nagarik Suraksha Sanhita (BNSS) | Bharatiya Sakshya Adhiniyam (BSA)]](https://www.yogiraj.co.in/wp-content/uploads/2026/05/Taxmanns-Bharatiya-Criminal-Laws-–-Bare-Acts-Hindi.jpeg)
![Taxmann’s Criminal Laws Combo [Diglot Edition] – Bharatiya Nyaya Sanhita (BNS) | Bharatiya Nagarik Suraksha Sanhita (BNSS) | Bharatiya Sakshya Adhiniyam (BSA)](https://www.yogiraj.co.in/wp-content/uploads/2026/05/Taxmanns-Criminal-Laws-Combo.jpeg)